Friday, May 19, 2006
Proper Breathing - Crank It Up
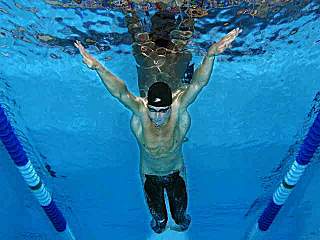
Keeping with the theme of streamlining your body position during freestyle stroke, it is imperitive that you don't destroy all your hard work when you go to breathe. Too many people - even people who believe themselves to swim well - lift themselves up to breathe, impeding the flow of water past their bodies. Their chests form a wall - creating virtual dams - against the water trying to flow past. Breathing when done properly is part of the stroke - not a separate step. It involves turning the body to the side. Vertically profiled fish are this shape naturally. You must do it deliberately. I have developed a routine which works for me. I'll share it with you here. Imagine two lever-armed cranks that go round and round on a single axel. Your arms are the two cranks - the axel is your collar bone. As you turn the crank, you can turn your body to the side on which you wish to breathe. I usually start turning my body to the side when my arm is near my hip. As I begin the recovery - bringing it forward, I slowly "crank" body to the fish-profile mode. It is here that I am in a natural - not forced - position to grab a mouthful of air. As my arm progresses past the top of the motion, I crank my head and body back to the normal flat - horizontal - position. Notice, I the breathing motion is part of the stroke. I'm finding that doing anything else is self-defeating and very tiring - no wonder people who swim poorly get worn out swimming just half-way across the pool!


Thursday, May 18, 2006
Another Way to Visualize a Straight Pull
I promised in my last post that I'd provide another helpful analogy for the freestyle pull. In past posts I talked about keeping a straight line - for streamlining purposes. Swimming pools have lanes painted along the bottom of each lane. When I'm doing my laps, I follow that line and often imagine it is a vertical ladder, along which I am suspended, parallel. To get from one end of the pool to the other, I imagine I must reach out and grab a rung of the ladder. To propel myself up the ladder, I imagine I must fight gravity, so I must pull the rung as hard as possible. When I get to my waist, I then must push the rung away, back behind me. When I've reach the maximum stretch behind me, I reach out and grab another rung with my other hand and repeat. This works to keep me straight and forces me to apply equal effort to both sides of my body. Perhaps you have an analogy that works for you - ideas are welcome!
Tuesday, May 16, 2006
Freestyle - My Secret to the Pull
I've drawn several analogies in my tips. Today and next time I'm going to include two more to give you an idea of how I approach the free-style pull. On dry-ground with your left hand touching your hip, stand on your tip toes and reach with your right hand as high as you possibly can. Imagine you are reaching for an apple hanging from a high tree branch. You can reach the bottom of the apple, but just barely. The way you get to your hand around the apple is to thrust your body up expanding your reach by the length of your lunge. The is where you start your freestyle pull. You've snagged the apple. You pull in down. Bring it to your waist and at that point, throw it back as far as you possibly can. Now repeat this with the other hand. Sounds silly right? Well, that's literally what you must do in the water. You must lunge as far forward as you possibly can, maintaing the torpedo profile. Cup your hand to hold as much water as possible. Maintaining that water in your hand pull it through to your waist (open your hand and you drop the apple - i.e. lose the water - where you throw it away behind you as hard as you possibly can. Your hand should end up touching your hip. Try it. You should get two distinct propulsion results out of this arc. First is the pull between picking the apple and your waist. Second is the push, where you throw the apple away. If you already know how to swim, you may find you can increase your speed proportionally to how much you increase the force of either (the pull and push) parts of the arc. Next post I'll tell you about the next analogy - climbing the ladder.
Wednesday, May 10, 2006
Picking a Pair of Swim Goggles
Off topic, but relevant, today we discuss goggles. Read bottom of post for my choice - you won't believe it it's so cool! First off, don't worry about what they look like. All goggles make the most attractive person look like an alien. Go for utility and lifespan. Obviously, you want them to fit snuggly so they don't leak. Avoid anything cheap - almost by definition, they'll leak. I prefer the single piece molded variety and avoid the three piece units (those with the snap on nose piece). Larger varieties are catching on - Navy Seals use these. But take note, Olympic swimmers seem to prefer the smallest types. I also look for a strap that I can adjust easily. Some are nearly impossible to adjust, while others have a poor rubber quality that breaks soon after purchase. Choose a name brand you are familiar with. You pay a little more, but you usually are ensured some level of quality. OK, here's an awesome pair of goggles. I want a pair - NOW! Attention vendors - I'll volunteer to be the first customer and guarantee you a mention in this blog.
Tuesday, May 09, 2006
Exaggerated Follow Through
Exaggerated Follow-Through. If you are an experienced swimmer or tried yesterday’s suggestion about brushing your ear as you pull your arm back in your follow-through you know I was exaggerating when I told you to tap your ear with your finger. Tried it this AM myself - doesn’t work. Here’s what does … As you pull up, you really do want to try to keep your arm and hand as close to your body as possible. Instead of your ear, try tapping just under your arm pit as you pull your arm up from your hip. After you reach your arm pit, shoot your hand forward. End with your fingers pointing forward and your arm parallel to the side of your head - touching your head if possible. Remember the main goal - you want to force yourself to maintain a consistent torpedo shape for slip-streaming purposes.
A Clarification about Follow-Through
If you are an experienced swimmer or tried my suggestion about brushing your ear as you pull your arm back in your follow-through you know I was exaggerating when I told you to tap your ear with your finger tips to your ear as you follow-through. I do exaggerate from time to time to make my point - please excuse me. You really do want to try to keep your arm and hand close to your body as possible as you pull up. Try tapping just under your arm pit as you pull your arm up. End with your fingers pointing forward and your arm parallel to the side of your head. Touching if possible. Remember the goal is a consistent torpedo shape for slip-streaming purposes.
About Prior Described Follow-Through
Follow Through Post was Exaggerated - If you are an experienced swimmer or tried my suggestion about brushing your ear as you pull your arm back in your follow-through you know I was exaggerating when I told you to tap your ear with your finger tips to your ear as you follow-through. I do exaggerate from time to time to make my point - please excuse me. You really do want to try to keep your arm and hand close to your body as possible as you pull up. Try tapping just under your arm pit as you pull your arm up. End with your fingers pointing forward and your arm parallel to the side of your head. Touching if possible. Remember the goal is a consistent torpedo shape for slip-streaming purposes.
Monday, May 08, 2006
Rubbing Ears Proper Freestyle Follow Through
Rubbing Ears - Proper Freestyle Follow Through
OK, so we’ve covered the minimum on freestyle pull. Now you want to get your arm back to the point of the torpedo. Again, we want to keep the streamline shape so we can keep the body flowing through the water. To do that, your recovery must be streamlined too. Lot’s of people screw this part up. They just swing their arms out, slowing themselves down and sometimes even whacking the poor people sharing the same lane. Both are pitiful. Here’s what’s wrong. Like the pull, you want your arms to come along side your body. Only you must bend your elbow. Do this - again, in front of your mirror. With left hand extended and right hand by your hip, draw your right hand up to your ear -then straight up and adjacent to the hand pointing up. Try to keep your elbows as close to your body as possible. Yes, it’s awkward. Now try it reversing the hand positions. When I taught my daughter this technique, I told her to bump her ears with each stroke. She became the fastest swimmer on the team from the get-go.
OK, so we’ve covered the minimum on freestyle pull. Now you want to get your arm back to the point of the torpedo. Again, we want to keep the streamline shape so we can keep the body flowing through the water. To do that, your recovery must be streamlined too. Lot’s of people screw this part up. They just swing their arms out, slowing themselves down and sometimes even whacking the poor people sharing the same lane. Both are pitiful. Here’s what’s wrong. Like the pull, you want your arms to come along side your body. Only you must bend your elbow. Do this - again, in front of your mirror. With left hand extended and right hand by your hip, draw your right hand up to your ear -then straight up and adjacent to the hand pointing up. Try to keep your elbows as close to your body as possible. Yes, it’s awkward. Now try it reversing the hand positions. When I taught my daughter this technique, I told her to bump her ears with each stroke. She became the fastest swimmer on the team from the get-go.
Skip the Dog
Confident kids generally learn dog paddle before they learn free-style. We're going to skip all that and go right into stroke technique. We're back home in front of the mirror for this lesson. Face the mirror with about three feet between you and any incumbrances - e.g., a sink, perhaps. Now raise your hands and put them above your head in the torpedo pose - straight arms, locked elbows, thumbnails together, fingers flush together and gently palms cupped (as if holding water). Keeping it straight, swing your right arm down, parallel to your body, until it touches your leg. Keep the other arm up - don't move it. You've done half a proper stroke and if you were in a pool you would now be gliding. Now try this with the left arm, keeping your right arm extended over your head (don't worry about swinging it back yet - that's a whole topic to itself). Now let's look at what you've done. You've swung your arms parallel to your body and kept your non-stroking arms straight over your head. Why? You want to maintain the torpedo profile for the water to slipstream past you. Next, you've kept your pulling arms straight. Why? You want to maximize the pulling lever. A long arm, provides a more powerful stroke than a bent arm. As easy as it is here in front of the mirror, this is tricky in the water and where nearly everyone does it wrong in the pool. Practice this motion and repeat it until you understand what is described above fully. Recovery next time.
Friday, May 05, 2006
How to Float
I got ahead of myself. I suppose I should have covered floating sooner. You need to master the basics of floating if you wish to swim proficiently. Notice, I didn't say you had to actually float. Some folks think they just can't. Others can actually float vertically - don't laugh, I've seen it. What I will demonstrate here is what is involved in floating. Why this topic? Any marginal ability to float may make you a better swimmer. People with an average to high level of body fat generally can usually float well with little problem. Where does that leave the rest? The secret is lung capacity. If you aren't the athletic type, you'll need to work on building that lung capacity. You want to figuratively create a stable balloon of air inside your chest. On dry land - how about that pool side chaise lounge or your favorite easy chair? Take the largest breath you can and hold it for about ten seconds. Then keep your chest inflated by letting only a little air out, replacing that marginal amount with fresh. By doing this, you make your center into a large air tank. The laws of physics say you will become more boyant. I learned this to a point I never thought possible. When I was a teen, I couldn't float at all. Then I learned this and practiced it. You can too. Do it until you are comfortable with this new form of breathing. Now get in the pool. Try lying back in the water with your back arched as far as you can. This forces your new air tank (your chest) to the top of the water. Let a little air out and as you feel yourself starting to sink, take in a quick sip of air to replace that which you've lost. Practice, practice, practice. Oh, by the way, the people on the pool deck think you're just sunning yourself. You look cool!
Tuesday, May 02, 2006
Best Swim Kicking Technique
Before you get excited, I'll cut to the chase and provide the answer to this question. For the most part, proper kicking is based on your personal comfort/fatigue level, but one technique surpasses the other in distance. Here's what I've found (all measurements are based on the number of times my left foot strikes the water). To travel 25 meters, with minimal wall-push-off, I can cover the pool in 40 whip kicks. Fast flutter takes 74 kicks, while slow flutter takes 65 kicks. I found this disparity surprising. The slow flutter is the easiest, and great for a novice. Kicking faster makes you work harder and more! If you are just learning to swim, don't think you'll do better if you flutter real fast. You'll just tire yourself out. Use the slow flutter until you've mastered basic free-style then try the whip kick. The whip kick is just as easy as the slow flutter - if you know how to do it - and you'll go much faster and farther. Here's the way I think of it. It follows the same motion as the flutter kick only it has a longer sweep. Imagine a buggy whip. You pull it back, then send it forward long and gently, but before you get to the end of the forward throw, you give it a quick snap. That's how a proper whip kick works too. That added snap. Try it. See if you can lessen the number of kicks you need to cover an equal distance. Let me know what you find.
Friday, April 28, 2006
Beginner Kickboard Concepts
In recent posts, I've suggested water familiarity, breathing technique, and body positioning. Moving on to kicking will give you a chance to practice all those skills and a couple more. If you've ever seen someone who is skilled using a kickboard, you'll get my drift. These folks can move in a dead straight line and place their face in and out of the water for breathing as needed. Sounds simple enough, but kickboarding is harder than it looks and some people make it harder than it needs to be. First off, let's talk about why we want to use a kickboard in the first place. Using a kickboard repeatedly while you learn, and even after, will help your body develop muscle memory. Kids develop that muscle memory by playing. You've got to do it deliberately. You need to kick when you swim, but it's not something you want to spend a lot of time thinking about. There are too many other things to concentrate on. So learn to use a kickboard and you will develop some critical swimming skills that will come in very handy later on. To start, get a kickboard and get in waist deep water near a pool wall. Before you kick, you should learn to balance. Hold the kickboard flat on the water with your hands on either side. Put it out ahead of you at arm's length. DO NOT lie on it. It's a guide, not a float. Holding your board out in front of you, push off the wall with one or two feet and see if you can maintain a straight line. Choose a target ahead of you and aim for it. As you slow down, put a foot down onto the floor of the pools and push off again. Repeat this over and over until you can go dead-straight with no tips to the left or right. When you are comfotable, try flutter kicking gently. Again, keep things straight. Your body should be torpedo straight. In my next post I'll discuss different kicking techniques and how some are more efficient than others.
Monday, April 24, 2006
Kick It - An Ah Ha Moment
Last summer I was lap swimming and another guy was in the lane next to mine. We were both doing freestyle and I was trying to keep up. He's a much better swimmer than I and occassionally watches my technique and offers tips. That day when we were done, he said I wasn't kicking - at all. This surprised me since I'm a pretty good kicker with a kickboard. I do 1/4 mile or more (400 meters +) with the board each session but apparently just drop it when I've got arms pulling me along. Nonetheless, I caught myself the next day dragging my feet behind me just as he said. I guess it's a good thing that I can swim with only 1/2 of my body. This certainly will come in handy if I'm ever paralyzed from the waist down, but for the moment I've still got four limbs working. Anyhoo, I've focused on the lower half lately during freestyle and found I can improve my speed substantially - duh! The best technique for me seems to be a whip kick. I'll focus on that in my next post. Stay tuned.
Tuesday, April 18, 2006
About those Olympic Swimmers Swim Suits
Today, we're back shopping again. This time we are going to buy a swim suit. Even if you are a non-swimmer, or novice, I can bet fairly confidently that you own some kind of swim suit. There is a problem though. It something you probably never thought about. Is your suit suitable for swimming (bad pun, I know)? I discovered the serious nature of this issue when I bought a casual (non-lap-swimming) suit and wore it to the pool one weekend. It was attractive enough. Bright yellow, with handy pockets. The color made my pasty white skin look tan even in the early part of the summer! But there were problems too, which I quickly discovered after I took my first two strokes in the pool. The pockets opened up under water, and caught the flow at my waist like a parachute catches air. I bet this single "feature" slowed me down twenty-percent easily. The legs billowed out too, adding even more drag. Now remember in yesterday's post how we want to be sleek and streamlined in our position? We want that in the suit you pick out. You don't have to buy one of those crotch huggers like the Olympians wear (but now you know why they wear them). Just find something that is sleek and avoids any tendency toward billowing. For men I suggest a suit that looks like bicycle shorts. They come down near the knee but are tight fitting (the thigh cut designs are just as good ... and unless you are confident type - or a bit strange - you don't want the tighty briefs). Whatever your choice, you still want to fit in, so just wear them under a regular (billowing) suit and strip off the billowing suit before (or just after) jumping in the water. I do this and just laugh it off when anyone questions me tossing a wet suit up onto the pool deck. I may feign pulling myself out of the water, stop and tell them they'd better just close their eyes (when unbeknownst to them, I've got the second suit on all along). For women, find a suit that is tight fitting, yet allows you to move your arms unrestricted. I've heard some complaints about the models with straps that come up high around the neck. Avoid those to prevent rubbing rash. Still, you want it high enough on the chest to cover any cleavage which can cause significant drag - think about it. The suit should fit snugly under the collar bones with no cleavage exposure (I can't believe I wrote that!). Also avoid any suits that feature dangly trim (e.g., skirts). Once you have your new suit, for fun you might want to try the kick off the wall torpedo drill before and after you've put on the sleek suit. Notice the difference. You'll go a lot farther with the same effort using the sleek suit. See, a good suit matters after all and now you have a perfectly good excuse to go bathing suit shopping - again.
Monday, April 17, 2006
Go How Far? No, Go Farther!
Like the rubber torpedo toy described in the last post, you should make like a torpedo when you swim. Now I haven't described stroke technique at all, so I'm not jumping ahead - of course go right ahead if you are already there. But try this first. It's something I used to do with friends when I was a kid for fun and if you've been keeping up with this blog, you're about ready for this. No, it's not juvenile. If you still can't put your head under without trouble and keep it there (holding your breath), go back and practice the tips I've provided in prior posts. Like my friends and I, you can do this and still look "cool." We sure were (ha ha). OK, hold onto the pool ledge in waste deep water as usual. Put your face in, lie out flat and hold the torpedo position. Practice this until you feel totally comfortable in this position. Come up and put your feet back on the bottom when you need air. When you feel comfortable with this routine see if you can hold the position after pushing off the wall. Go ahead and kick off the wall and go immediately into the torpedo. Experiment. See how far you can go. You may surprise yourself. See what happens when you turn a little bit left or right, even just a little bit - you won't go as far. Choose a goal - a lane in the pool or boey and see if you can kick off, go into the torpedo position and with no subsequent motion of your own, glide to that point. Repeat until you go can unbelievably far. Boy you look cool!
Wednesday, April 12, 2006
First Get a Kid's Toy Torpedo
As promised, today we are going to the toy store. When you get there, go to the pool toys area and buy one of those small solid rubber pool torpedos. They are generally available in four-inch and an eight-inch lengths (the one you find may be different from this link). You'll only need one. Buy one or the other (by the way, when we're done, you're giving the thing away - unless you have some other nasty ideas which we don't want to think about). The smaller ones are probably cheaper, but will still get our point across. Now, we're going to the pool, and since we are still trying to learn this stuff without embarassing ourselves, you might want to bring a kid along with you - makes playing with the torpedo a little less unusual, don't you think? OK, take the torpedo out of the packaging and with the toy in your hand, stand in water that comes up to your waist - no higher. Toss the torpedo to your partner (the kid) and see if you can make it go straight. If you can't do it at first, try slapping it down on the water before releasing it. This may take some trial and error. Before long you will get it and it will race through the water like a powered rocket, much faster than you might have imagined. If you've tossed it incorrectly, you'll find that the torpedo goes only a few feet through the water and curls around and falls to the bottom of the pool. What's the lesson here? The torpedo goes fast and sure only when it is going in a straight line. Any opposing forces and it goes wacky. The lesson for applied swimming is the same. Going in a straight path will aid in your swimming. Remember the line you lay down upon in the most recent post? That's the position to take in the pool as you apply your stroke technique. Your energy and effort will not get wasted if you approach your swimming with that straight line position. No varying it, or you'll end up like the mis-thrown torpedo at the bottom of the pool. OK, we're done with the toy. You may now give the kid the torpedo. Come on, give it. Now!
Tuesday, April 11, 2006
Going Straight At It
If you are still reading these posts, you know that I'm including some pretty strange, albeit straightforward advice. This post focuses on both. I am going to show you the first and most basic thing about swimming straight and forward. I know that's an awful pun. OK, look the space around you. You can be anywhere - but you'll probably want to be somewhere private. Find a place that is at least nine feet long and has a straight line. A carpet break or hardwood floor space works well. Look at that line closely. Imagine you are swimming along that line - not an inch to the right or left of that line - along the line and only along that line. Got it? I'm going to now show you the most basic position in swimming that most every swimming teacher skips. Take off your shoes and lie down on your stomach on top of that line (this is why you want to be alone - yes, I'm trying to help you here). Put your hands out in front of you so each thumb touches one side of the line. Now position your big toes along the same places on the line behind. Is your belly button on top of the line? Your nose? If not, you aren't doing this right. Yes, you should feel ridiculous - you can laugh if you like. OK, you can get up, but remember where you've been. The point of this line thing is that to swim efficiently, one must follow a completely straight line. As you move forward, you cut a line through the water. Any divergence from the straight line presents an unwelcome force that will fight against you as you swim. This arrow you've made with your body cuts through the water most efficiently. This is true for the best swimmers and the worst. In my next post, I'm going to demonstrate this to you. Get excited, we're going to go to the toy store and laugh some more!
Friday, April 07, 2006
How to Breathe Underwater
OK, the title is sort of a ploy to get you to read this blog. But wait! There's always a lesson, kids! Here's one absolutely knockout, cool link that really shows you how to breathe underwater . And here's another that asks why we even bother. I personally think both rule!
Wednesday, April 05, 2006




Bend and Snap
Let's be even more cool. If you've got long, straight hair (enough to give you bangs or better) and you're doing the deep breath, dip thing - described in my last post, you might try the ol' move from the Pretty in Pink movie - "bend and snap" - only do it in the pool. Repeat the steps from the post above, but use the face-forward method. Wto hen you are ready pull your head out, do so quickly and let your hair fly back. Very cool. Might even catch someone's eye on the pool deck. Heck, they might even want to jump in the pool with you!
Subscribe to:
Posts (Atom)