Friday, May 05, 2006
How to Float
I got ahead of myself. I suppose I should have covered floating sooner. You need to master the basics of floating if you wish to swim proficiently. Notice, I didn't say you had to actually float. Some folks think they just can't. Others can actually float vertically - don't laugh, I've seen it. What I will demonstrate here is what is involved in floating. Why this topic? Any marginal ability to float may make you a better swimmer. People with an average to high level of body fat generally can usually float well with little problem. Where does that leave the rest? The secret is lung capacity. If you aren't the athletic type, you'll need to work on building that lung capacity. You want to figuratively create a stable balloon of air inside your chest. On dry land - how about that pool side chaise lounge or your favorite easy chair? Take the largest breath you can and hold it for about ten seconds. Then keep your chest inflated by letting only a little air out, replacing that marginal amount with fresh. By doing this, you make your center into a large air tank. The laws of physics say you will become more boyant. I learned this to a point I never thought possible. When I was a teen, I couldn't float at all. Then I learned this and practiced it. You can too. Do it until you are comfortable with this new form of breathing. Now get in the pool. Try lying back in the water with your back arched as far as you can. This forces your new air tank (your chest) to the top of the water. Let a little air out and as you feel yourself starting to sink, take in a quick sip of air to replace that which you've lost. Practice, practice, practice. Oh, by the way, the people on the pool deck think you're just sunning yourself. You look cool!


Tuesday, May 02, 2006
Best Swim Kicking Technique
Before you get excited, I'll cut to the chase and provide the answer to this question. For the most part, proper kicking is based on your personal comfort/fatigue level, but one technique surpasses the other in distance. Here's what I've found (all measurements are based on the number of times my left foot strikes the water). To travel 25 meters, with minimal wall-push-off, I can cover the pool in 40 whip kicks. Fast flutter takes 74 kicks, while slow flutter takes 65 kicks. I found this disparity surprising. The slow flutter is the easiest, and great for a novice. Kicking faster makes you work harder and more! If you are just learning to swim, don't think you'll do better if you flutter real fast. You'll just tire yourself out. Use the slow flutter until you've mastered basic free-style then try the whip kick. The whip kick is just as easy as the slow flutter - if you know how to do it - and you'll go much faster and farther. Here's the way I think of it. It follows the same motion as the flutter kick only it has a longer sweep. Imagine a buggy whip. You pull it back, then send it forward long and gently, but before you get to the end of the forward throw, you give it a quick snap. That's how a proper whip kick works too. That added snap. Try it. See if you can lessen the number of kicks you need to cover an equal distance. Let me know what you find.
Friday, April 28, 2006
Beginner Kickboard Concepts
In recent posts, I've suggested water familiarity, breathing technique, and body positioning. Moving on to kicking will give you a chance to practice all those skills and a couple more. If you've ever seen someone who is skilled using a kickboard, you'll get my drift. These folks can move in a dead straight line and place their face in and out of the water for breathing as needed. Sounds simple enough, but kickboarding is harder than it looks and some people make it harder than it needs to be. First off, let's talk about why we want to use a kickboard in the first place. Using a kickboard repeatedly while you learn, and even after, will help your body develop muscle memory. Kids develop that muscle memory by playing. You've got to do it deliberately. You need to kick when you swim, but it's not something you want to spend a lot of time thinking about. There are too many other things to concentrate on. So learn to use a kickboard and you will develop some critical swimming skills that will come in very handy later on. To start, get a kickboard and get in waist deep water near a pool wall. Before you kick, you should learn to balance. Hold the kickboard flat on the water with your hands on either side. Put it out ahead of you at arm's length. DO NOT lie on it. It's a guide, not a float. Holding your board out in front of you, push off the wall with one or two feet and see if you can maintain a straight line. Choose a target ahead of you and aim for it. As you slow down, put a foot down onto the floor of the pools and push off again. Repeat this over and over until you can go dead-straight with no tips to the left or right. When you are comfotable, try flutter kicking gently. Again, keep things straight. Your body should be torpedo straight. In my next post I'll discuss different kicking techniques and how some are more efficient than others.
Monday, April 24, 2006
Kick It - An Ah Ha Moment
Last summer I was lap swimming and another guy was in the lane next to mine. We were both doing freestyle and I was trying to keep up. He's a much better swimmer than I and occassionally watches my technique and offers tips. That day when we were done, he said I wasn't kicking - at all. This surprised me since I'm a pretty good kicker with a kickboard. I do 1/4 mile or more (400 meters +) with the board each session but apparently just drop it when I've got arms pulling me along. Nonetheless, I caught myself the next day dragging my feet behind me just as he said. I guess it's a good thing that I can swim with only 1/2 of my body. This certainly will come in handy if I'm ever paralyzed from the waist down, but for the moment I've still got four limbs working. Anyhoo, I've focused on the lower half lately during freestyle and found I can improve my speed substantially - duh! The best technique for me seems to be a whip kick. I'll focus on that in my next post. Stay tuned.
Tuesday, April 18, 2006
About those Olympic Swimmers Swim Suits
Today, we're back shopping again. This time we are going to buy a swim suit. Even if you are a non-swimmer, or novice, I can bet fairly confidently that you own some kind of swim suit. There is a problem though. It something you probably never thought about. Is your suit suitable for swimming (bad pun, I know)? I discovered the serious nature of this issue when I bought a casual (non-lap-swimming) suit and wore it to the pool one weekend. It was attractive enough. Bright yellow, with handy pockets. The color made my pasty white skin look tan even in the early part of the summer! But there were problems too, which I quickly discovered after I took my first two strokes in the pool. The pockets opened up under water, and caught the flow at my waist like a parachute catches air. I bet this single "feature" slowed me down twenty-percent easily. The legs billowed out too, adding even more drag. Now remember in yesterday's post how we want to be sleek and streamlined in our position? We want that in the suit you pick out. You don't have to buy one of those crotch huggers like the Olympians wear (but now you know why they wear them). Just find something that is sleek and avoids any tendency toward billowing. For men I suggest a suit that looks like bicycle shorts. They come down near the knee but are tight fitting (the thigh cut designs are just as good ... and unless you are confident type - or a bit strange - you don't want the tighty briefs). Whatever your choice, you still want to fit in, so just wear them under a regular (billowing) suit and strip off the billowing suit before (or just after) jumping in the water. I do this and just laugh it off when anyone questions me tossing a wet suit up onto the pool deck. I may feign pulling myself out of the water, stop and tell them they'd better just close their eyes (when unbeknownst to them, I've got the second suit on all along). For women, find a suit that is tight fitting, yet allows you to move your arms unrestricted. I've heard some complaints about the models with straps that come up high around the neck. Avoid those to prevent rubbing rash. Still, you want it high enough on the chest to cover any cleavage which can cause significant drag - think about it. The suit should fit snugly under the collar bones with no cleavage exposure (I can't believe I wrote that!). Also avoid any suits that feature dangly trim (e.g., skirts). Once you have your new suit, for fun you might want to try the kick off the wall torpedo drill before and after you've put on the sleek suit. Notice the difference. You'll go a lot farther with the same effort using the sleek suit. See, a good suit matters after all and now you have a perfectly good excuse to go bathing suit shopping - again.
Monday, April 17, 2006
Go How Far? No, Go Farther!
Like the rubber torpedo toy described in the last post, you should make like a torpedo when you swim. Now I haven't described stroke technique at all, so I'm not jumping ahead - of course go right ahead if you are already there. But try this first. It's something I used to do with friends when I was a kid for fun and if you've been keeping up with this blog, you're about ready for this. No, it's not juvenile. If you still can't put your head under without trouble and keep it there (holding your breath), go back and practice the tips I've provided in prior posts. Like my friends and I, you can do this and still look "cool." We sure were (ha ha). OK, hold onto the pool ledge in waste deep water as usual. Put your face in, lie out flat and hold the torpedo position. Practice this until you feel totally comfortable in this position. Come up and put your feet back on the bottom when you need air. When you feel comfortable with this routine see if you can hold the position after pushing off the wall. Go ahead and kick off the wall and go immediately into the torpedo. Experiment. See how far you can go. You may surprise yourself. See what happens when you turn a little bit left or right, even just a little bit - you won't go as far. Choose a goal - a lane in the pool or boey and see if you can kick off, go into the torpedo position and with no subsequent motion of your own, glide to that point. Repeat until you go can unbelievably far. Boy you look cool!
Wednesday, April 12, 2006
First Get a Kid's Toy Torpedo
As promised, today we are going to the toy store. When you get there, go to the pool toys area and buy one of those small solid rubber pool torpedos. They are generally available in four-inch and an eight-inch lengths (the one you find may be different from this link). You'll only need one. Buy one or the other (by the way, when we're done, you're giving the thing away - unless you have some other nasty ideas which we don't want to think about). The smaller ones are probably cheaper, but will still get our point across. Now, we're going to the pool, and since we are still trying to learn this stuff without embarassing ourselves, you might want to bring a kid along with you - makes playing with the torpedo a little less unusual, don't you think? OK, take the torpedo out of the packaging and with the toy in your hand, stand in water that comes up to your waist - no higher. Toss the torpedo to your partner (the kid) and see if you can make it go straight. If you can't do it at first, try slapping it down on the water before releasing it. This may take some trial and error. Before long you will get it and it will race through the water like a powered rocket, much faster than you might have imagined. If you've tossed it incorrectly, you'll find that the torpedo goes only a few feet through the water and curls around and falls to the bottom of the pool. What's the lesson here? The torpedo goes fast and sure only when it is going in a straight line. Any opposing forces and it goes wacky. The lesson for applied swimming is the same. Going in a straight path will aid in your swimming. Remember the line you lay down upon in the most recent post? That's the position to take in the pool as you apply your stroke technique. Your energy and effort will not get wasted if you approach your swimming with that straight line position. No varying it, or you'll end up like the mis-thrown torpedo at the bottom of the pool. OK, we're done with the toy. You may now give the kid the torpedo. Come on, give it. Now!
Tuesday, April 11, 2006
Going Straight At It
If you are still reading these posts, you know that I'm including some pretty strange, albeit straightforward advice. This post focuses on both. I am going to show you the first and most basic thing about swimming straight and forward. I know that's an awful pun. OK, look the space around you. You can be anywhere - but you'll probably want to be somewhere private. Find a place that is at least nine feet long and has a straight line. A carpet break or hardwood floor space works well. Look at that line closely. Imagine you are swimming along that line - not an inch to the right or left of that line - along the line and only along that line. Got it? I'm going to now show you the most basic position in swimming that most every swimming teacher skips. Take off your shoes and lie down on your stomach on top of that line (this is why you want to be alone - yes, I'm trying to help you here). Put your hands out in front of you so each thumb touches one side of the line. Now position your big toes along the same places on the line behind. Is your belly button on top of the line? Your nose? If not, you aren't doing this right. Yes, you should feel ridiculous - you can laugh if you like. OK, you can get up, but remember where you've been. The point of this line thing is that to swim efficiently, one must follow a completely straight line. As you move forward, you cut a line through the water. Any divergence from the straight line presents an unwelcome force that will fight against you as you swim. This arrow you've made with your body cuts through the water most efficiently. This is true for the best swimmers and the worst. In my next post, I'm going to demonstrate this to you. Get excited, we're going to go to the toy store and laugh some more!
Friday, April 07, 2006
How to Breathe Underwater
OK, the title is sort of a ploy to get you to read this blog. But wait! There's always a lesson, kids! Here's one absolutely knockout, cool link that really shows you how to breathe underwater . And here's another that asks why we even bother. I personally think both rule!
Wednesday, April 05, 2006


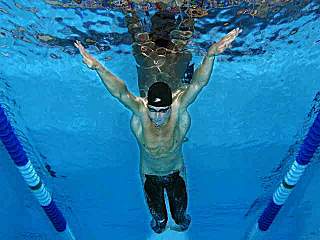


Bend and Snap
Let's be even more cool. If you've got long, straight hair (enough to give you bangs or better) and you're doing the deep breath, dip thing - described in my last post, you might try the ol' move from the Pretty in Pink movie - "bend and snap" - only do it in the pool. Repeat the steps from the post above, but use the face-forward method. Wto hen you are ready pull your head out, do so quickly and let your hair fly back. Very cool. Might even catch someone's eye on the pool deck. Heck, they might even want to jump in the pool with you!
Friday, March 31, 2006
Be Cool, Look Cool, Be Cool Again
If you've kept up, you may recall one of my main premises is that many adults don't bother to learn to swim because the effort required can look very uncool - a real problem given that one of the unwritten protocols of going to any pool is to look like you were born to live in a swim suit. Continuing on from the last post, here's how to look cool and work on your technique. I mentioned hanging on the edge of the pool. Be sure you are in a depth you can stand with your shoulders extending out of the water about three - five inches. Now from a position with your back against the wall, in this order - remember, we're being cool here - take a breath and hold it, close your eyes, remove your sunglasses, step forward one-half step and lean your head back until the water behind you comes up over and covers your face. Stay under about five seconds and come back smoothly on the same track you dipped in. Wait another five seconds and if you are so endowed, push your hair straight back, put your sunglasses back on, and lean back against the wall again. If you've done this all this without inhaling any water up your nose or wiping your face, you are making great progress. Repeat this about a minute later until you have mastered it. If you have trouble with water going up your nose - it happens to the best of us - start out doing this dip face first and work your way up to dipping in backwards as suggested above. Congrats - and by the way, you did look cool!
Monday, March 27, 2006
Take a Shower - Repeat
By now you are probably wondering if this blog is worth your time. If you already are comfortable in the water, this post will most definately underline that concern. Are you ready? This post deals with getting your face wet. Don't laugh - I'm serious. I first discovered the problem of new swimmers getting their faces wet when I was working as a camp swim instructor for the Boy Scouts. One week, I had a bunch of kids from the inner city - kids who didn't swim too often, if at all. I started them off, having them wade into the water and allowed them to get wet. My boss had told me to watch them closely since many had no swimming experience. He was right and they were easy to spot. Almost to a boy, those who had no experience would get their faces wet and then immediately wipe the water off their faces like they had just been splashed in the eyes with paint. They'd blink and keep wiping until they were comfortable again. I was stunned. To me, water on my face was as natural as air. It looked like I had a problem I hadn't ever imagined. I'd have to get them to cease wiping their faces if any of them were going to learn to put two consecutive swimming strokes together. To break them of this, I made up a competitive game of face-dunking. Boys that successfully put their faces in the water and came out without wiping, got to go a little deeper. The power of peer pressure was a thing of beauty. If you are an adult, we have other methods. This only works for wiggly 11-year-olds. Since that time I've seen countless novice swimmers do the face wipe thing. It has nothing to do with demographics. OK, now for the laughable advice - I recommend you beginner adult swimmers take a shower. Put your face in the stream. Get it soaking wet, but keep your hands to your sides or behind your back. Now take remove your face from the stream and open your eyes. Resist any spontaneous urge to wipe your face off. When you are comfortable, put it back in the stream and repeat. If you have some pool lounging time, hang out by the wall and drop your head (or just your face) under water from just a moment and repeat the steps above. You goal is to get comfortable with water on your face whenever it is there. Now practice.
Wednesday, March 15, 2006
Sit Back, Breathe Deep and Repeat
In my last post, I talked about the importance of breathing awareness - how one should learn to understand how one breathes. This awareness will let you logically know when you must breathe and when you can hold on for a while. Panic attacks may become a thing of the past. I practice my breathing each time I do lap swimming, and my wife tells me I even do it when I sleep. As good swimmers prepare for lap swimming it is common to see them rolling their shoulders - to loosen them up. I use that time to take some seriously deep breaths - then, when I finally enter the pool and start my first lap, I see how far I can go without taking my first breath. I've been surprised to see that I get further almost every week. I'm learning to breathe! If you are new to swimming, you can do this too. Get back in that easy chair I spoke of in my last post, and take a deep breath, hold it for about 10 seconds, and exhale. Repeat this for a minute or two. You may find yourself starting to relax. This is normal and part of your "exercise." If you practice this over time, you may find yourself holding on a little longer. Don't push it. That's not the point, and can lead to trouble. Now breathe and relax. That's how we are going to approach stroke technique when we get to that point.
Thursday, March 02, 2006
Hold your Breath - Here's Something to Think About
One strategy I want to focus on first is breathing technique. If you can breathe regularly (in and out without a respirator) you should be able to breathe easily once you've learned some basics about water fun. If you've ever seen someone who is uncomfortable in the water, the first thing they do when they put their head under for just a second or two is to lift up their head quickly and take a huge breath. Why? These folks certainly aren't out of breath after just a second or two. Something else is at work. Probably some sort of survival instinct. In future posts, we're going to work on that and then learn some simple timing rules so that one can breathe regularly in the water. In the mean time, if you are here to learn something about swimming technique, I suggest you sit down in your favorite easy chair and think about your breathing. Don't laugh - that will screw this all up. Really! OK, are you in your chair? Relax and close your eyes. Notice your breathing cadence, your effort, how much air you are bringing in and letting out. Tonight, tomorrow or whenever you are in the shower, think about these same things. Focus on the ease. Think of something peaceful. If you can build a memory of how breathing feels, when we finally get in the pool, you are going to be much better able to build good breathing technique quickly than if you have not. Now breathe!
Thursday, February 23, 2006
Breathing Should Be Easy - Anywhere?
Why is it true, that most people on dry land can hold their breath for 30 seconds or more, but put their heads under water in a pool for the first time and they get out of breath within a matter seconds? The quick answer, I believe, is comfort and habit. I aim to show you that there really is little difference between dry land and the depths of the pool. It's just a matter of psychology. Just think about that for a while and I'll get into it more in my next post.
Monday, February 20, 2006
Why Flounder?
In my last post, I wrote about how learning to swim for adults is entirely different than it is for kids. Some will argue that this is not the case. After all, many adults have learned to swim using the same age-old techniques used for everyone for countless years. That's true. What I posit is that there are easier ways. Ways that use the intellect and reason adults have, that children do not. These techniques I believe, will start the adult-swimming novice off on the right track immediately. There will be the step-arrangement, as in any learning process, but we will skip past some of the more useless embarassing steps that the old-school uses. Think about learning to swim. Chances are, you might have avoided lessons because of embarassment. The steps that will be provided in this blog can be practiced in a pool with dignity. I don 't want you to learn like a flounder. I want you to learn like a dolphin! Hold tight. We'll be starting soon.
Saturday, February 18, 2006
Learn Like an Adult, Not Like a Kid
If you've ever watched a kid taking a swimming lesson, you see some pretty common things. They get the kids wet, make sure they aren't afraid of the water, show them how to kick using some sort of floatation device, and eventually break them of the float. What isn't so obvious is what is going on inside the kids' heads - all the brain wiring that is taking place. It's automatic for them. For adults, that automatic processing just doesn't happen. The work around means we must incorporate some very deliberate, very adult steps, to learn. Forthcoming entries will focus on some very odd, albeit important steps in learning to swim as an adult. Like the kids, we will learn to get wet, breathe, float, glide, stroke. The difference is, during the lessons we will learn why we must do certain things. Swimming seems so obvious - because kids can do it - but putting all the pieces together just doesn't happen for adults - the wiring isn't as fast. We will teach ourselves through physical understanding what is going on and why. This way, the student (you, perhaps), won't just jump ahead and learn to swim the wrong way. The worst thing you can do as an adult is learn the wrong way. If you do, you'll end up like all those adults you see in the pools who say they know how to swim, but quite frankly, look like they are almost drowning.
Wednesday, February 08, 2006
The Barrel that Swims Like a Dolphin
Now the title of this blog is "Swimming is Easy" and so far my examples seem to indicate that the only those who can swim easy, are thin people. Fear not my friend. Today I'm going to the other extreme with another fine example witnessed during my morning ritual. Back some years ago, when I was just catching the daily swim bug and still lacking the knowhow to pull any distance without hanging on the wall for a while, I witnessed a fellow lap-swimmer who was not as wall-challenged as I. He was what I would call a machine. He could swim for an hour without so much as lifting both ears out of the water at the same time - a goal I wished for but had no idea how to achieve. Anyhow, this isn't about time in pool - I'll save that for another day. This is about size. I concluded after watching his stamina that there were any number of lessons I could take away. The first was body type didn't matter. This guy was what some might call the short, fat variety of man-dom. He was shaped like a barrel - thick at the top of his chest as he was at the base of his torso, with legs like short logs, yet he moved through the water with grace and style. There was a clear sense of timing and flow. He was in control. I plan to address all these in future posts. So I leave you with this. Anyone can learn to swim. We just need to learn what works for us. This blog will focus on those skills as we go forward. Until next time - being all wet isn't bad at all! - Splashdog
Friday, February 03, 2006
Fluid Dynamics and Body Shape
Last post I mentioned a small, dark skinned girl that I saw swimming several years ago. She was as fast and effortless a swimmer as I have ever seen. As luck would have it, today I saw her when I was coming in to the pool for my workout. She was on "dry land" as some of us call the pool deck - not swimming as she was last time I saw her. She was polite and said hello. I noted she seemed to be of Indian (Asian) descent, was small boned and lanky - not tall, but not short either. She was very thin, had almost no chest in the feminine sense and little in the way of hips. Her shoulders were small as well. In fact, the distance from neck to the tip of her shoulders was much smaller than your average woman. I don't mention this out of derision. No, I believe it may be part of her swimming secret. Despite her lack of muscle and fat (for floating), she made up for it with something else - minimal fluid friction. She was almost shaped like a spear or a dart. Throw a spear into water straight on and watch what happens. Initially it speeds through the water like a rocket, going further than you might expect with minimal applied force. It slows most apparently, only when side forces start influencing the trajectory. In future posts I am going to discuss further about this facet - what I am discovering about fluid dynamics and swimming - with other examples. This is but one real-life example of how shape can influence outcomes. It is but one exciting discovery I have found.
Subscribe to:
Posts (Atom)